How to Configure Microsoft Clarity Content Insights Metrics for your Blog Site

26.11.2023 г.
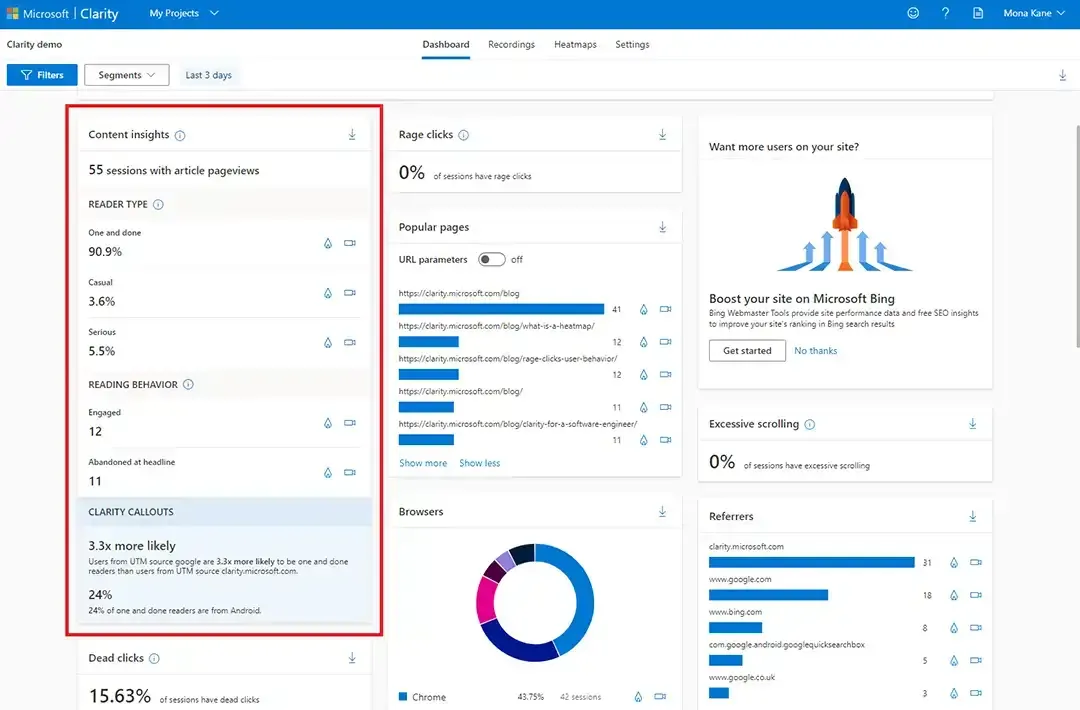
Clarity offers a set of metrics and insights to help you better understand the reading and browsing patterns of articles on your site.
Content Insights Metrics
If your website is a blog, you can follow these steps to view the Content Insights Metrics through Clarity embedded experience.
Step 1: Adding Data Attribute
- Open your project with the codeditor.
- In the file responsible for your article page, within the content area section of the file, find the opening tag of the
<article>element. - Insert the data attribute data-clarity-region=“article” into the article tag.
- Review the modifications to ensure accuracy and save the changes.
Example:
<html>
   <head>
   <body>
        ...
        <article data-clarity-region="article">
        ...
        </article>
   </body>
</html>
Step 2: Verifying Content Insights Integration
- Visit one of your blog posts on the live website.
- Right-click on the blog post content and select Inspect or Inspect Element from the context menu (depending on your browser).
- In the developer tools, navigate to the HTML section and locate the
<article>tag of your blog post content. - Verify that the data attribute data-clarity-region=“article” is present in the
<article>tag.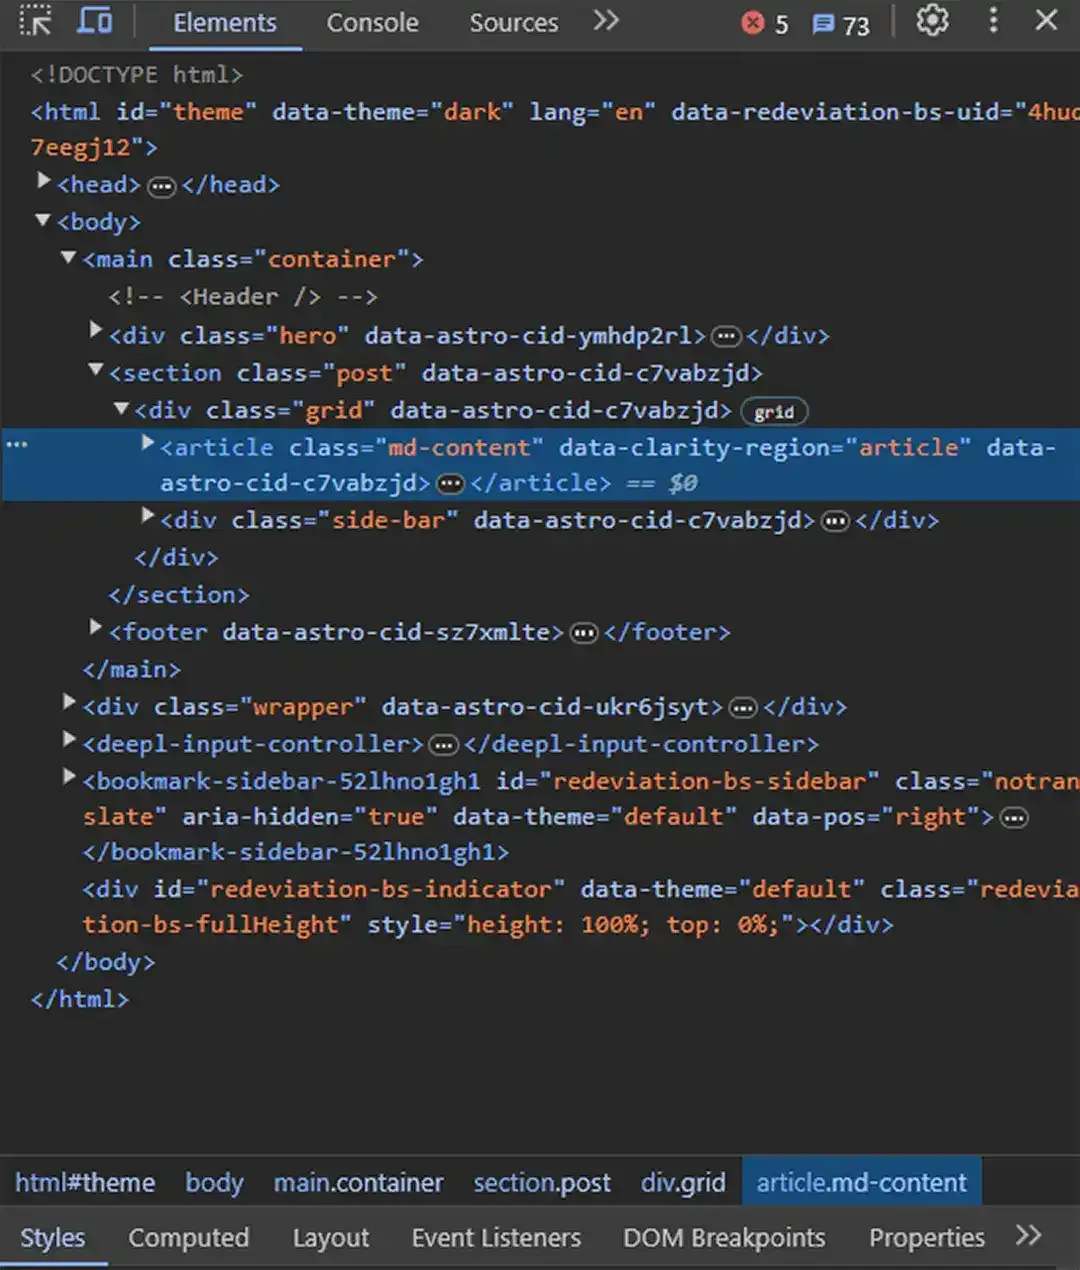
How can I start seeing these insights?
We have automatically configured the article detection for your blog site so you can see these insights today!